I read an excellent article at Lifehacker recently, ‘Empty Your Inbox with the Trusted Trio‘. I don’t know about you, but I have tried several methods in the past and repeatedly failed at keeping a clean inbox. It’s too soon to tell for sure if this method will work, but I like it so far. Be sure to read the article for all of the details and related reference material. What I want to do here is simply share how I implemented this at work- specifically when using Microsoft Outlook 2003.
As written in the Lifehacker article, the premise here is to create 3 folders and process every item from your inbox using those 3 folders (anything that doesn’t fit these 3 would be deleted). The 3 folders are Archive, Follow-up, and Hold. I think they are relatively self-explanatory, but be sure to reference the original article for elaboration on those concepts.
Creating the 3 folders should be simple enough, and it is, but you need to take a few extra steps to make this system really useful. Outlook comes with a number of default folders that you are stuck with, or at least are likely to want to keep around because you are used to using them (such as Drafts, Outbox, Sent Items, etc…). I’m okay with keeping those folders, but I don’t want to look at them unless I have to. Based on this system, I will only be working with 3 folders so I want those to draw my visual focus to those 3 folders and make them easily distinguishable from the rest. You can accomplish this by creating your new folders and putting an underscore ( _ ) at the start of the folder name- this will keep the folders you want to focus on at the top of the list.
The next step is to make sure we don’t just put email in these folders and forget about it. It’s okay to forget about the archive folder since that can be searched later, but I want to know that I have items waiting for me in Follow-up and Hold. The easiest way to accomplish this is to right click on the folder, choose properties, select the General tab, and click on ‘Show total number of items‘ (see the image below). This will give you a numerical count of the emails in the folder and highlight the folder name in bold (see the above image). I think this gives you a nice way to track how much work you need to do while keeping your inbox clean and organized.
My next step will be to put this system in place on my Gmail account, though it is currently a bit of a mess so that may take some time. I’ll come back and share how I did that in the future.
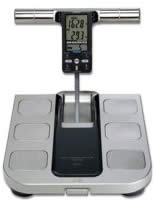 I’m using the
 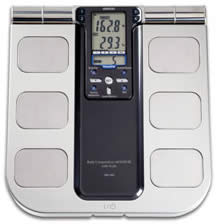 The
The  Once you’ve stored a profile, using the scale is fairly simple, although you need to pay attention to the order of operations in order to get correct measurements.